I love making ice cream cakes in the summer! It’s simple, and it doesn’t heat up the kitchen, and everyone just loves them! This is my kids favorite cake, so I make it for every birthday. Each child can pick their three favorite flavors of ice cream and their cake base, so their cake is customized just for them!
Some of them like a version my Black Forest Cherry Cake, so I use chocolate and cherry ice creams with a German chocolate cake base. An all-sherbet and vanilla cake with an angel food base is a yummy and refreshing twist, while a chocolate, Oreo, and mint chip cake with a Devil’s Food base is simply decadent.
Ingredients and supplies:
3 flavors of ice cream
Prepared cake (optional)
Saran wrap
Prep Time: Hands On: 20 minutes Freeze Time: 3 hours
- Start by setting one carton of ice cream out to soften for about 20 minutes. You will want to choose either the flavor you want the most of, or the color of ice cream which will be visible on the outside of the cake.
- While the ice cream softens, place a large rounded mixing bowl in the freezer to chill. A glass or ceramic bowl will work much better than a plastic one.
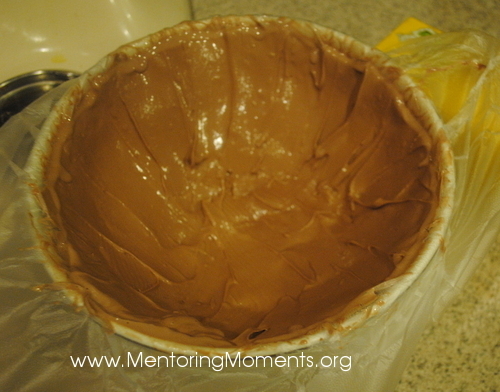
- Remove the mixing bowl from the freezer and line the bowl with saran wrap. You may need more than one sheet if it is a large bowl; it is fine to overlap the sheets.
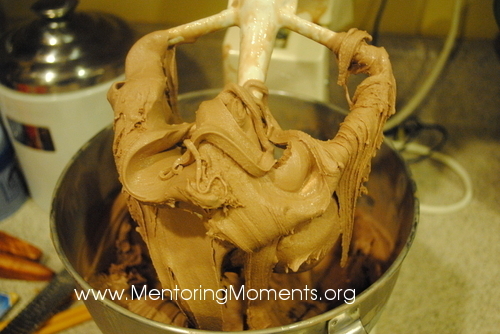
- Scoop out the ice cream into a stand mixer with the paddle blade attached and beat until the ice cream is smooth and spreadable, about 2 minutes.
- Using a rubber spatula, spread the ice cream into the prepared bowl, leaving an indentation in the middle and spreading the ice cream up the sides of the bowl.
- Put the bowl in the freezer for an hour or until the ice cream is firm.
- Repeat the steps with the second flavor of ice cream; unless your bowl is extremely large, you won’t need an entire carton for flavor # 2.
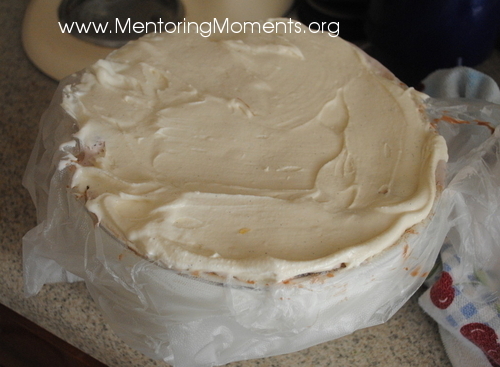
- Once the second layer has become firm, repeat once more with flavor #3. You’ll use the least amount of this ice cream. Make sure to completely fill the indentation in the middle of the ice cream bombe, taking care to smooth off the bottom so that it will sit flat. Return it to the freezer once more for the final freeze.
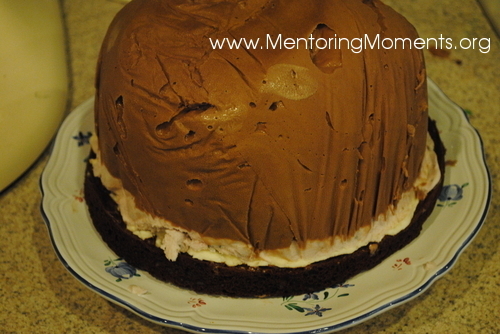
- Some members of my family prefer to have a cake layer on the bottom of the ice cream bombe. I usually bake up 1/3 of a cake mix in an 8” round pan (using the rest of the mix for cupcakes) and press the cooled layer onto the bottom of the bombe. Freeze again to bond the cake layer to the ice cream. Another option is to purchase angel food or sponge cake and press pieces of that onto the bottom layer. Other times we don’t add a cake layer at all, and just enjoy the full flavor of the ice cream.
- To unmold the cake, tip it upside down onto a platter. Wet a dish towel under hot water and wring it out; then place it on top of the bowl. Repeat until the cake begins to loosen enough to slide out of the bowl. Remove the saran wrap and serve as is, or embellish with cool whip.
Flavor options:
When the ice cream bombe is tipped out of the bowl it looks like a half circle. One of our favorite summer ice cream bombes calls for lime sherbet for the outer layer, a thin layer of vanilla ice cream in the middle, and strawberry sorbet for the inner layer. We crush up chocolate wafer cookies and mix them into the strawberry sorbet layer before putting it in the mold. When this bombe is cut, it looks like sliced watermelon!
Another fun bombe uses any red ice cream or sorbet for the outside layer; decorate with chocolate wafer cookies to simulate a lady bug. Use a cupcake for the head and thin black licorice for antennae.
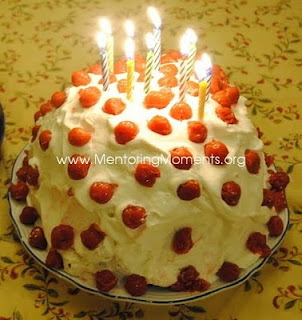
My most requested ice cream bombe is Black Forest Cherry Bombe. We use chocolate chip cherry, chocolate, and vanilla ice cream, and a layer of German chocolate cake for the base. Once the finished cake is tipped out onto a platter I cover it with cool whip and dot the cake with canned sour cherries which have been drained and patted dry.
This recipe has also been published on Mentoring Moments for Christian Women.


Speak Your Mind